## Concurrency
In this tutorial, we are going to see how Visual SceneMaker is able to work with concurrent operations. We will create a simple program that adds andsubstracts values from a variable concurrently.
<br/> <br/>
We will start by creating a new project as mentioned in the tutorial on <a href="tut_newSceneFlow.html" >how to create a SceneFlow.</a>
Name the project **ExampleConcurrency** and drag 4 basic nodes into the workspace, then connect them with **Timeout Edges** as shown in the following image:
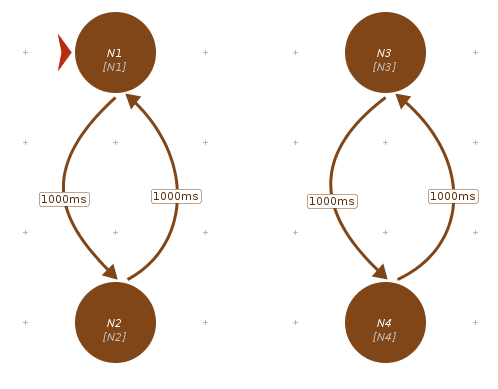
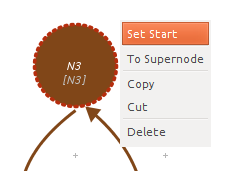
Well done! Make sure to make N3 a **start node** so we have 2 threads running at the same time (one that transitions between N1 and N2, and another between N3 and N4). In order to do this, right click node N3 and select **Set Start** from the drop down menu.
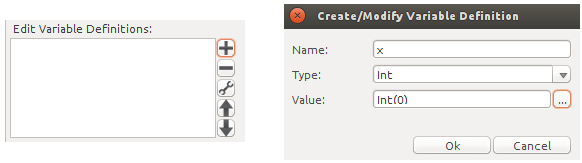
Now we will create a variable that will be modified for both processes. Click on the workspace and go on the right panel to create a new integer variable called **x** with initial value 0.
If everything went fine, now you will see this variable displayed on the workspace. The next step is to add a command to modify the value of the variable we just created. Let's create a command that adds one to the current value of the **x** variable. For this, select N2 and add a new command on the right panel.

We will do the same for N4 but in this case we will substract one from the current value of our variable. Remember that you can always change an assigned command by double clicking in the command badge of the containing node. Lastly change the timeout value of the transitions in the second process (N3 to N4) to 2000. You can do so by double clicking the edge or by right clicking it and selecting the *modify* option from the dropdown menu.

Play the program and see how the value of x (shown in the workspace) updates accordingly.
Back to Tutorials Index...