## Creating an Echo extension
In this tutorial you will create your first extension. This extension is quite simple, it basically outputs on the console everything what the agent says.
Let's beging!
### Setting up our extension
First of all, we need to create the package structure for our extension. Therefore, in your favourite IDE, go to the folder *src/de/dfki/vsm/xtension* and create a new package called: **echo**.
From now on, all the classes that we create related to our extension should go inside this package.
Next, we need to create the main class, responsible of executing our agent's actions. Inside the **echo** package, create a new class called: **EchoExecutor**. To really indicate that this class is going to execute the agent's commands, we need to specify it by extending from the class **ActivityExecutor**.
### Creating a blueprint
When we write in our IDE, that we extend from **ActivityExecutor**, our IDE will suggest us to implement the missing methods.
Our class should look something similar to this:
```
package de.dfki.vsm.xtension.echo;
import de.dfki.vsm.model.project.PluginConfig;
import de.dfki.vsm.runtime.activity.AbstractActivity;
import de.dfki.vsm.runtime.activity.executor.ActivityExecutor;
import de.dfki.vsm.runtime.project.RunTimeProject;
public class EchoExecutor extends ActivityExecutor {
public EchoExecutor(PluginConfig config, RunTimeProject project) {
super(config, project);
}
@Override
public String marker(long id) {
return null;
}
@Override
public void execute(AbstractActivity activity) {
}
@Override
public void launch() {
}
@Override
public void unload() {
}
}
```
Great! Now we have a blueprint for our amazing extension.
### Making it work!
We are almost finished with our extension. The next step is to implement the neccesary methods to make our agent do things.
First of all, we need to implement the **marker** method. This method sets a marker for every action the extension receives. In our case, we want to identify every activity with a token and the unique identifier of the action. Ex.: *$1*, identifies the first activity. This logic is implemented with the following code:
```
@Override
public String marker(long id) {
return "$" + id;
}
```
Finally, comes the interesting part. Showing the text on the console. For that, we need to implement the logic of what the agent would do everytime he executes a new activity, inside the *execute method*
```
@Override
public void execute(AbstractActivity activity) {
System.out.println("Agent " + activity.getActor() + " said: " + activity.getText());
}
```
Compile and execute:
> If you are using Netbeans as your IDE, you just need to click those two buttons: *compile* and *run*
> Otherwise you need to execute the **ant** tasks: *build* and *exec*
Thats it! Our extension is now ready to receive activities and show them on the console
### Testing our extension
Now that we have finished with the implementation, it is time to see our agent in action. For that, we need to create a project that uses our newly created extension and an agent.
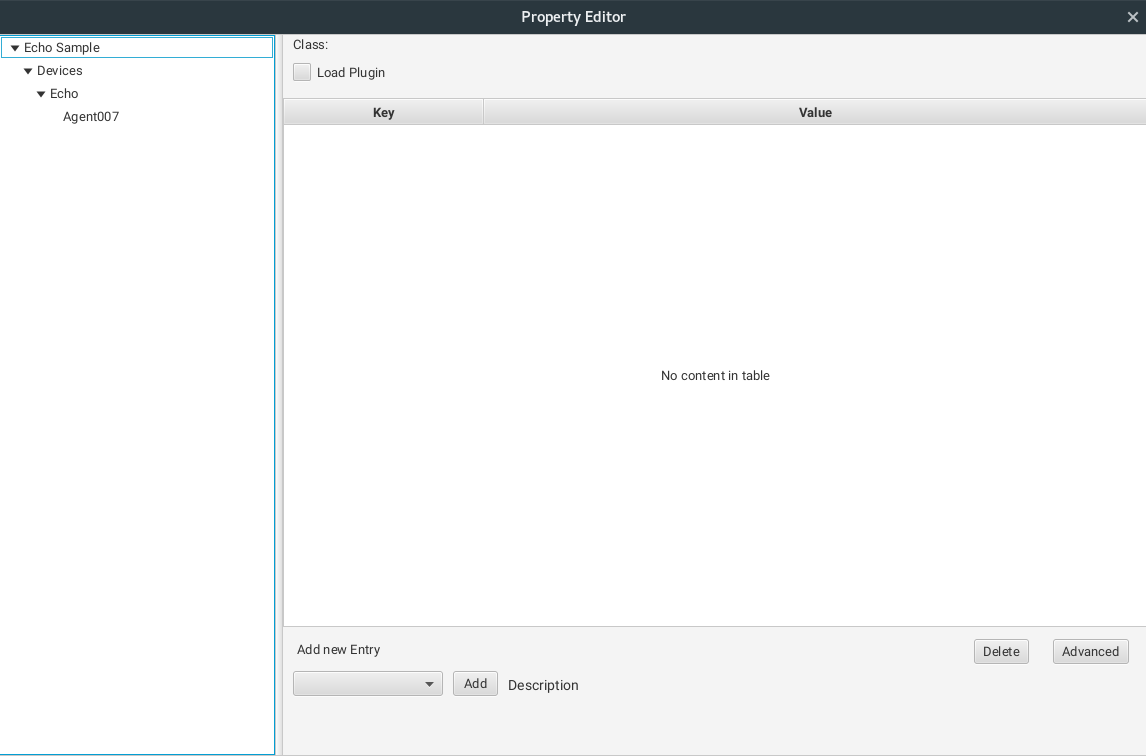
Create a new project. You can name it as you want, for this tutorial we named it *Echo Sample*. After the VSM workspace is opened, save the project in your filesystem. Now, we are able to customize the project using the *Project Settings* window.
1. Go to devices on the left panel and select the *Echo Executor* in the Dropdown.
2. Add a name to the device: *Echo* and press **Add Device**
3. Select the newly created device on the left pane and press right click. When the pop up menu appears, press *Add new agent*.
4. Double click the *Agent1* and name it *Agent007* for example.
5. Close the project editor.
The project configuration editor should look like this:
### Modeling in VSM
Lets model the behavior to our agent. The model is really simple, just to illustrate the use of our agent.
1. Create two nodes connected by a *Timeout edge* if 1000ms
2. Add a new scene using the *plus button* in the *scene script editor*
3. Add a new scene
4. Drag the newly created scene to the end node (N2)
5. Save and Run
Everything should look like the following picture.
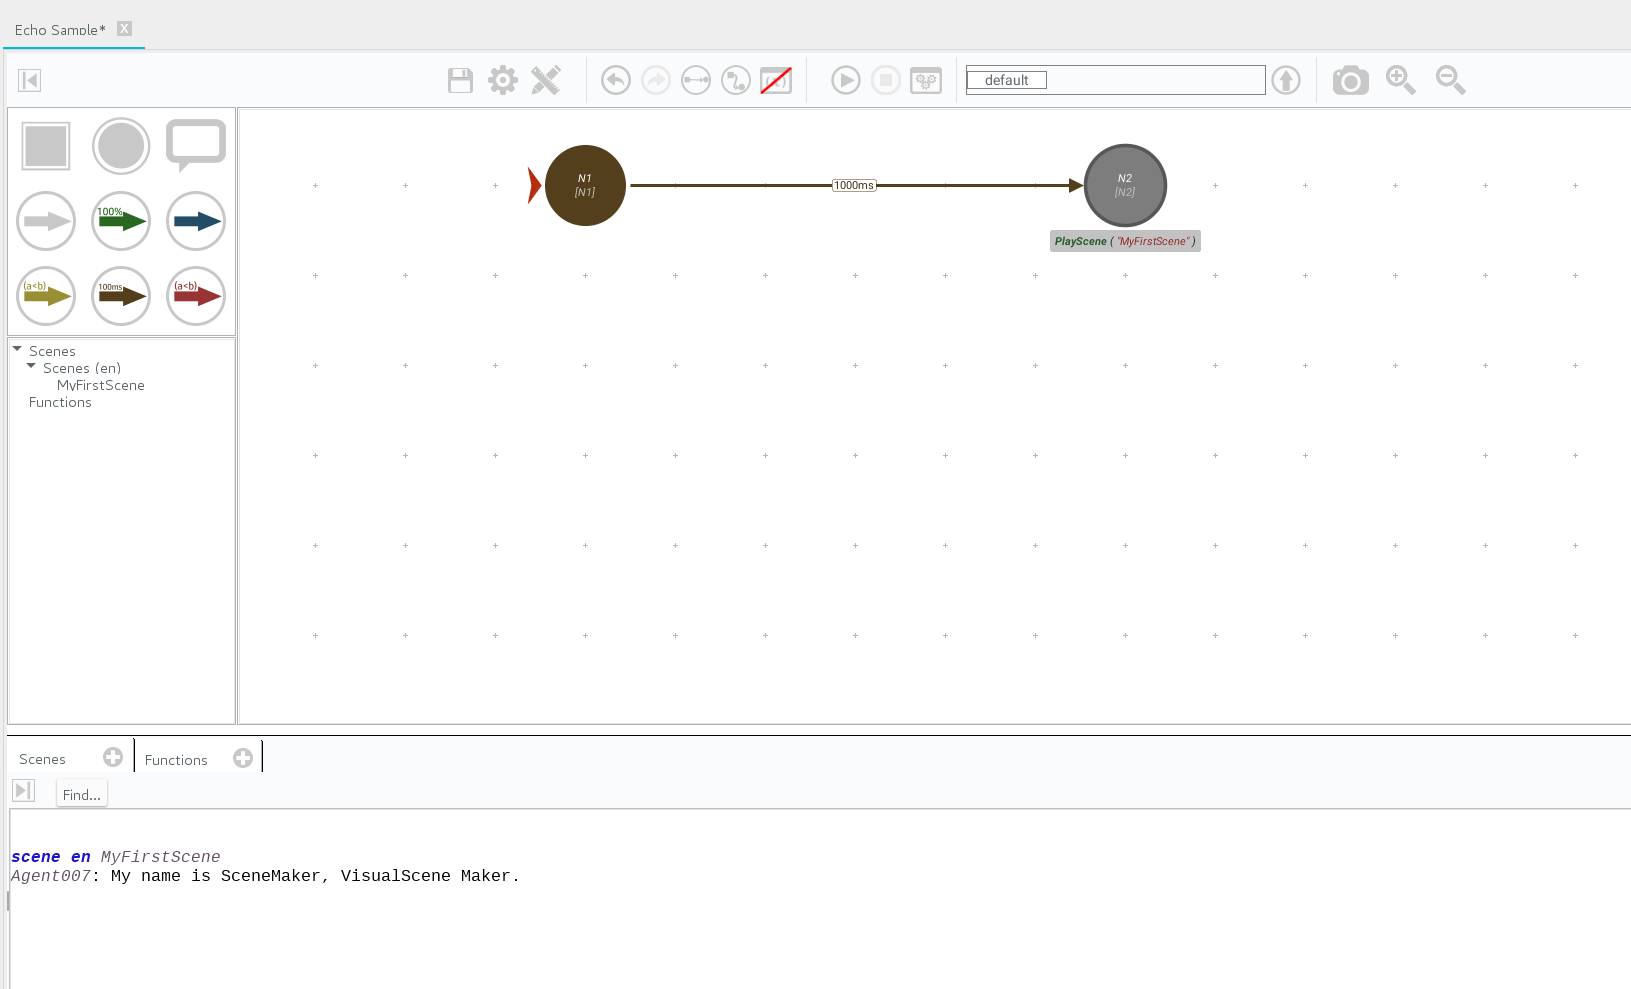
After running, if you check the console log in your IDE you should see something like:
```
Agent Agent007 said: My name is SceneMaker,
Agent Agent007 said: VisualScene Maker.
```
Congratulations! You have just finished your first VisualScene Maker extension.
In the next tutorial we will see a more complex exmaple, where we will connect VSM with 3D avatar: **DECAD**
Back to Tutorials Index...