## Working with Scenes
SceneMaker realizes an approach for authoring interactive performances of virtual characters that relies on the separation of the narrative structure of an interactive performance and the ultimate content of the performance. The interactive narrative structure of an interactive performance is defined using a Sceneflow, a hierarchical state-transition diagram. And the content of the interactive performance is provided by Scenes.
In other word, Scenes are the means for an author to describe and organize the story and dialogue content of an interactive performance. They consist of pieces of spoken dialogue that can be written very similar to a screenplay. There are tags to describe the virtual characters’ non-verbal behavior, such as gaze, gestures and body postures as well as tags that influence the computation of the emotional or the cognitive status of virtual characters.
The extructure of a scene is as follows:
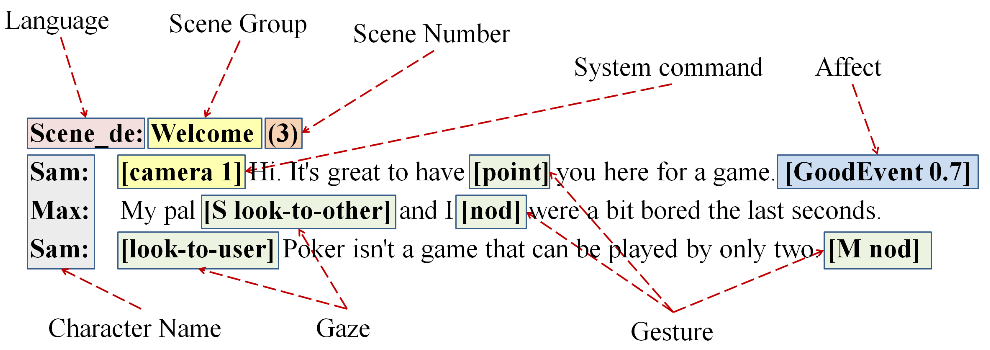
In the header of the Scene, the user language, the name of the Scenegroup and the number of the Scene from that Scenegroup are defined. The body of the Scene shows the utterances of two characters and the different types of tags that can be integrated. The tag [camera 1] is a system command and causes a movement of the camera to a pre-defined position in the virtual world. Tags like [point] or [nod] specify gestures while the tag [look-to-user] causes the corresponding virtual character to look to the user. Finally, the tag [GoodEvent 0.7] influences the computation of the affect of a virtual character.
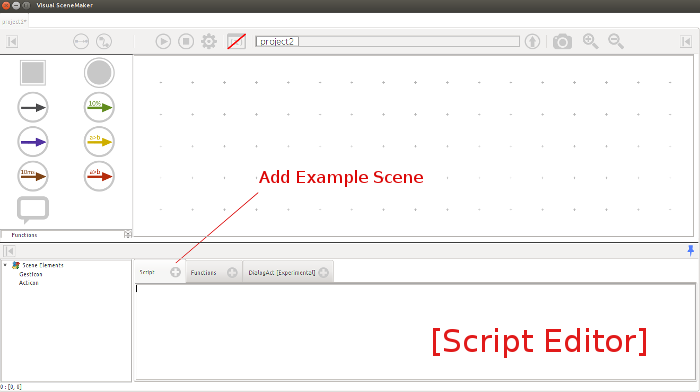
Scenes are easily created in the script editor and you can add an example template by clicking on the add button of the Script tab. Once the editor recognizes your scene as a valid one. It will be added as building block element to the left panel of SceneMaker.
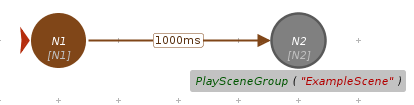
Analogously to a function, you can drag your newly created scene to a node in the workspace. The scene will then be played along with the project.
Back to Tutorials Index...